Using a serger does not have to be an exercise in frustration. I love my Brother 1034D and use it several times a week, but I have definitely made a few mistakes along the way. Some involved ugly neckbands. Others involved forgetting something as basic as lowering the presser foot.
These are the habits that have made the biggest difference for me: testing the actual project fabric, understanding a few key settings, keeping the machine clean, and getting comfortable with threading. Nothing especially glamorous, but all very helpful when the alternative is wanting to chuck the serger out a window.
I mainly use the four-thread overlock stitch to finish seams. The machine can do more, but I bought it primarily for that function, and I am perfectly happy leaving it set up that way. These tips focus on that everyday use rather than every possible stitch conversion.
Safety first: Read the Brother 1034D manual before operating, threading, or maintaining your machine. Switch off and unplug the machine before threading or cleaning, and follow the manual’s instructions for positioning and accessing its parts.
Key Takeaways
- Test the exact project fabric before choosing differential feed, stitch length, and stitch width.
- Use a longer stitch length when intentionally stretching a knit neckband during serging.
- Lower the presser foot before sewing and remove accumulated lint regularly.
- Rethread the Brother 1034D in order: 3, 4, 2, then 1.
Table of Contents
- Always Test a Scrap of Your Actual Project Fabric
- Understand the Three Settings You Will Use Most
- Use Differential Feed to Avoid Wavy Knit Edges
- Lengthen the Stitch When Stretching a Knit Neckband
- Check the Presser Foot Before You Start
- Clean Out the Lint Every Couple of Projects
- Rethread the Brother 1034D From Scratch
- Rotate Matching Cones to Even Out Thread Use
- A Little Preparation Makes Serging Much Easier
Always Test a Scrap of Your Actual Project Fabric
My biggest recommendation is also the simplest: test the exact fabric you are about to use before serging your project. Not something vaguely similar from the scrap bin. The same fabric.
Double knit, a 100 percent cotton bedsheet, and canvas can all behave differently under the presser foot. A setting that produces a nice edge on one may stretch, gather, or otherwise annoy the next.
A test scrap gives you a chance to check:
- Whether the fabric feeds smoothly.
- Whether the finished edge lies flat or develops waves.
- Whether the fabric gathers when you do not want it to.
- Whether the stitches are spaced appropriately.
- Whether the overlock width suits the edge you are finishing.
The important part is to look at the fabric after it has come out of the machine and relaxed. That is especially useful with knits, because the fabric may look quite different once you stop stretching or handling it.
Understand the Three Settings You Will Use Most
You do not have to explore every feature on the Brother 1034D to make it useful. Knowing what these three adjustments do makes testing a lot less mysterious.
Differential feed controls how the fabric moves
Differential feed changes how the fabric is fed through the serger. Depending on the setting, it can encourage the fabric to stretch out or ease together as it moves beneath the presser foot.
In practical terms, this is one of the first settings I look at when a knit edge becomes wavy. A higher setting can help counteract stretching, while a lower setting encourages more stretching.
Stitch length controls the spacing between stitches
A longer stitch length spaces the stitches farther apart along the seam. A shorter stitch length places them closer together.
That sounds straightforward, but it becomes particularly important when you stretch a knit while attaching something like a neckband. Once the fabric relaxes, those stitches become more concentrated.
Stitch width controls the width of the overlock
Stitch width determines how wide the overlocking stitch is across the fabric edge. It is a different adjustment from stitch length: one changes the width of the edge finish, while the other changes the spacing along it.
I do not constantly change everything on my machine. I prefer to keep my usual setup and make the adjustments the fabric actually needs.
Use Differential Feed to Avoid Wavy Knit Edges
Spongy double knit gave me a very clear lesson in why differential feed matters.
With the differential feed deliberately set too low, my sample stretched as it fed through the machine and developed a wavy, lettuce-like edge. That can be a look you want for some projects, but it was definitely not the goal here.
For that particular double knit, moving the differential feed to its highest setting helped the fabric feed more easily and produced a much flatter edge, without the same wave or curl.
That does not mean every knit belongs on the highest setting. A delicate fabric or a different knit, such as jersey, may need a less aggressive setting. The useful lesson is to adjust for the fabric in front of you, not to memorize one number for an entire category.
Cotton and canvas may behave differently
I also tried cotton with the differential feed at 2, expecting obvious gathering. It gathered less than I anticipated, probably because that particular fabric was quite stable. I then moved to about 1.5, which I preferred for that sample.
Those numbers describe my test, not a guaranteed recipe for every woven fabric.
Canvas was another good example. With the stitch length set to 3, I tested both the lowest and highest differential-feed settings. The lower setting seemed to stretch it slightly during feeding, but the canvas stayed fairly stable and performed reasonably well at both extremes.
Sometimes the test reveals a dramatic difference. Sometimes it tells you the fabric is forgiving. Either way, you have learned that on a scrap instead of on your project.
Lengthen the Stitch When Stretching a Knit Neckband
This is one of those lessons I learned on actual garments, and the results were not pretty.
When attaching a knit neckband, the band is usually shorter than the neckline, so you stretch the band as you sew it into place. If the stitch length is already very short while the fabric is stretched, the stitches end up packed closely together when the fabric springs back.
My comparison was pretty obvious:
- Longer stitch length: The stitches became more closely spaced as the stretched fabric relaxed, giving me the result I wanted.
- Shorter stitch length: The stitches became far too concentrated after the fabric relaxed.
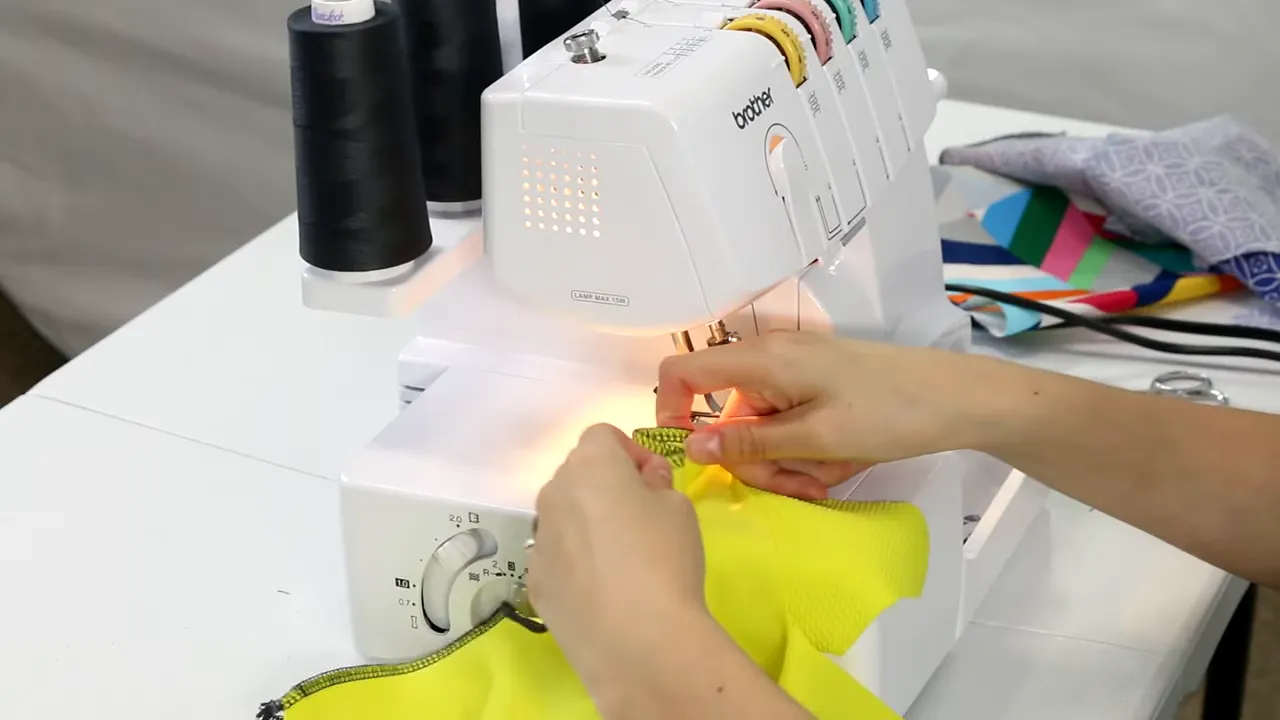
Excessively dense stitching can also contribute to fabric damage. Needle choice matters, too, particularly when working with knits, so use a suitable needle that is compatible with your machine and fabric.
For a knit that I will be stretching during serging, I keep the stitch length toward the longer end rather than automatically using the shortest setting. On my sample, a very long setting worked better, but I still want to test before committing to a neckline.
The distinction here is important: stretching a neckband intentionally is not the same as stretching every knit seam. Test the technique you will actually use on the project.
Check the Presser Foot Before You Start
I have forgotten to lower the presser foot more than once. A little embarrassing? Yes. Worth mentioning if it saves someone else the same mess? Also yes.
It is especially easy to do after stopping to readjust something. You lift the foot, move the fabric, and then start serging again without putting it back down.
The result is a very unattractive edge instead of the neat finish you expected.
My basic starting routine is:
- Position the knife and needle area as directed in the manual so the fabric can be placed correctly.
- Raise the presser foot before inserting the fabric.
- Position the fabric.
- Lower the presser foot before serging.
If a seam suddenly looks terrible after you have paused to adjust something, check that foot before assuming the whole machine has developed a problem.
And keep scissors nearby. Between cutting thread chains and trimming scraps, you will use them constantly.
Clean Out the Lint Every Couple of Projects
My Brother 1034D has not required a lot of maintenance in my experience, but cleaning out the inside is something I do regularly, usually after every couple of projects.
Open the front cover and the amount of fuzz inside can be impressive. Not impressive in a good way.
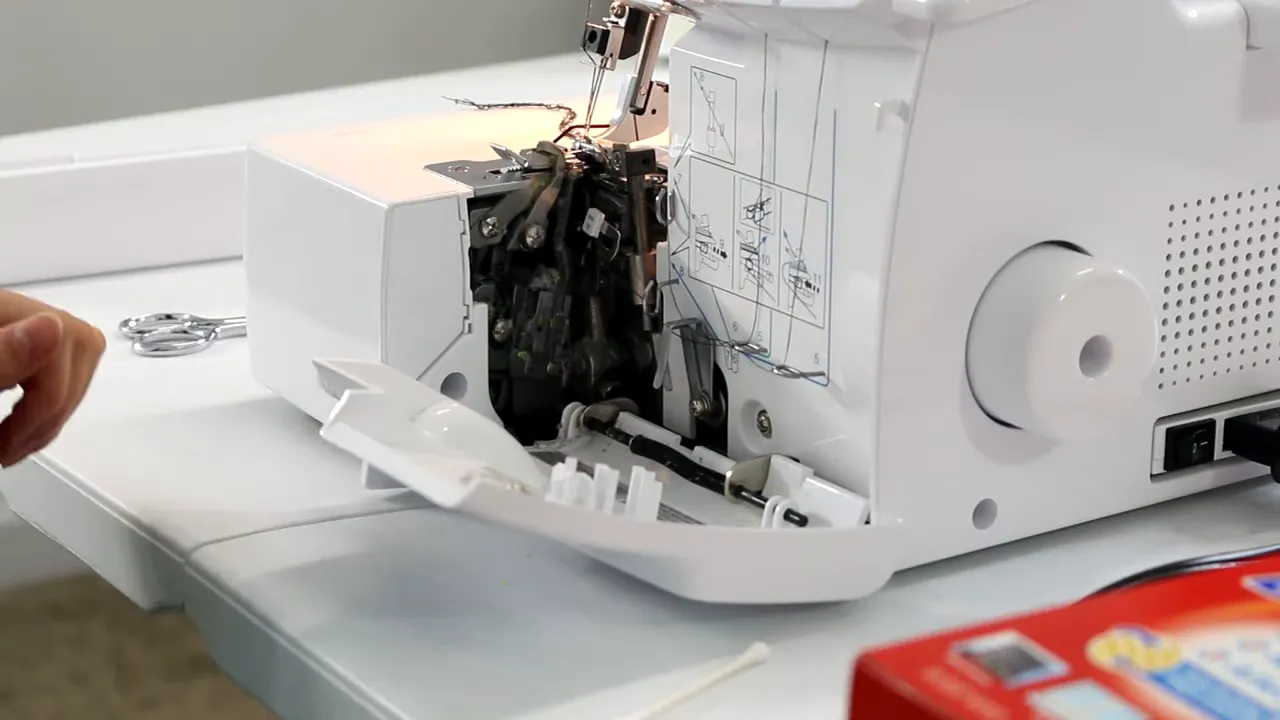
My cleanup tools have been cotton swabs and Clorox Triple Action Dust Wipes. I use the swabs to loosen accessible fuzz and the dry dust wipes to pick it up rather than simply move it around.
These are dry dust-catching wipes, not wet disinfecting wipes. Check the manual’s cleaning guidance before using any product inside your machine.
My routine is simple:
- Switch off and unplug the serger.
- Open the front cover according to the manual.
- Gently remove accessible lint with a cotton swab.
- Collect the loosened dust and fuzz with the dry dust wipe.
- Clean the surrounding work surface and empty the debris into a nearby trash can.
For a small accessible area, I have wrapped a bit of the dust wipe around the end of a cotton swab to help grab the lint. The goal is to remove it, not push it farther inside.
I avoid blowing air into the machine for that same reason. Sending the fuzz deeper into the mechanism is not the kind of cleaning progress I am after.
The dust wipes have also been useful around my sewing area beyond the serger. The following is an affiliate link; as an Amazon Associate, I earn from qualifying purchases.
Rethread the Brother 1034D From Scratch
Changing thread is the part that seems to intimidate everybody. Personally, I find starting from scratch easier than tying the new threads onto the old ones and pulling them through.
I would rather follow the threading paths again than worry about pulling knots through the tension discs or other small openings. With practice, I have gotten to the point where I can usually rethread the machine in under five minutes, unless I run into a stubborn spot. Which does happen.
For one thread change, I switched from dark gray to pink because my next project used pink and blue fabric. The process is the same regardless of color.
Clear the old threads and prepare the new cones
I cut the old threads and chain off the remaining thread before switching off and unplugging the machine for rethreading. Then I remove the old cones and set up the new ones.
Use the spool holders and accessories appropriate to your thread package, following the manual. Guide each thread through its corresponding upper metal guide and tension path.
Keep the machine’s tweezers beside you. Honestly, aside from the serger itself, they may be my favorite thing that came in the box.
Follow the threading order: 3, 4, 2, 1
The Brother 1034D threading order is 3, 4, 2, 1. Thread the loopers first, then the needles. The color-coded paths help enormously once you get familiar with them.
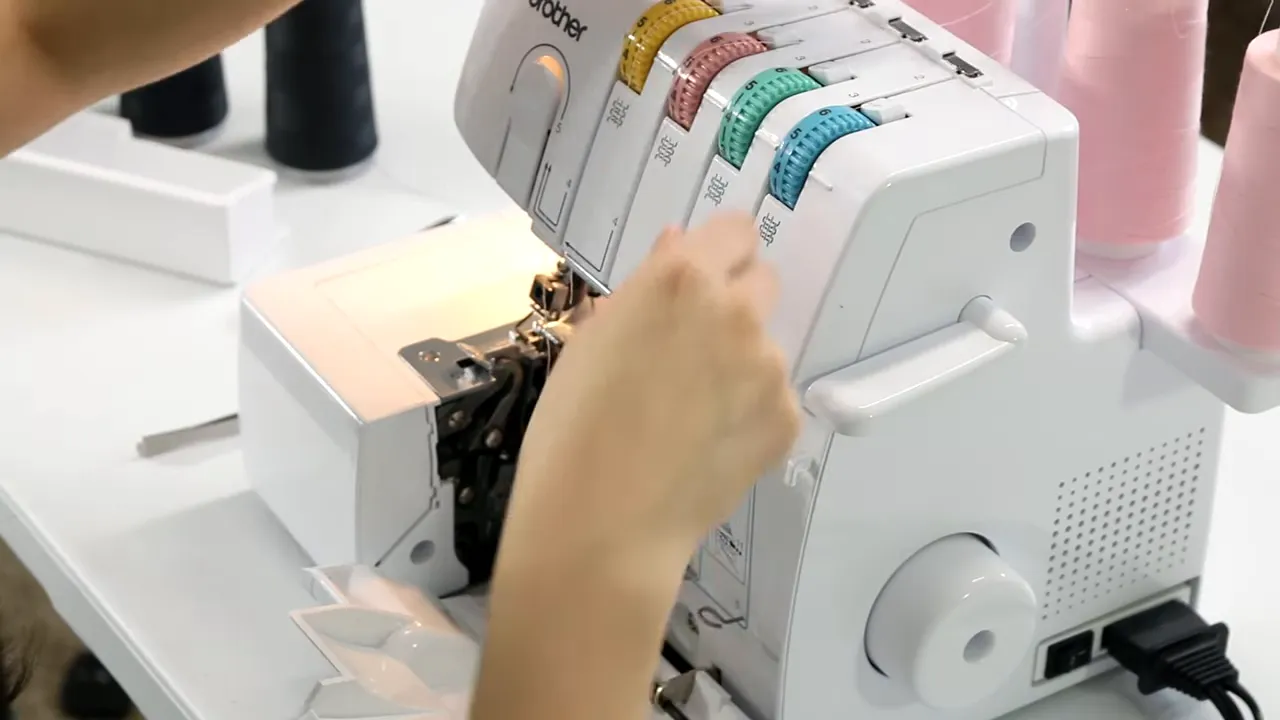
- Thread 3, the green upper-looper path. Follow each color-coded guide and thread the looper eye. Use tweezers to catch the end and bring the tail beneath the presser foot.
- Thread 4, the blue lower-looper path. Follow the guides and hook, use the pull-out threading mechanism as directed, return it to position, and thread the small eye. Pay close attention to the diagram showing how the lower-looper thread passes beneath the upper looper.
- Thread 2, the right needle. Follow its guides and thread the right needle. This portion feels more like threading a conventional sewing machine.
- Thread 1, the left needle. Complete the remaining needle path and thread the left needle.
This is a practical overview, not a replacement for the machine’s threading diagrams. For a closer reference, I also have a detailed Brother serger threading tutorial.
Make the small openings less frustrating
If a thread end is fuzzy or refusing to cooperate, snip off a little to give yourself a clean end. Then use the tweezers to guide it through the opening or catch it on the other side.
A needle threader is another option. There is no prize for making this harder on yourself, even if I occasionally seem determined to do exactly that.
Before testing, make sure all four thread tails are under the presser foot. Close the covers, replace the catch basket, lower the presser foot, and only then restore power and test slowly.
I finish with a scrap-fabric test to confirm that the machine forms stitches properly. A completed threading path is encouraging; a clean test seam is what tells me we are back in business.
Rotate Matching Cones to Even Out Thread Use
One last small habit: rotate your matching thread cones among the positions when you change or rethread them.
In my use, cone position 3 consumes noticeably more thread than the others. If the same cone always stays there, it runs out much sooner.
Moving the cones around helps spread that usage across the set. Think of it as rotating a mattress, only with more thread and fewer heavy objects.
A Little Preparation Makes Serging Much Easier
The habits that save me the most frustration are not complicated: test the actual fabric, adjust differential feed and stitch length for the job, remember the presser foot, clean out the fuzz, and follow the threading order.
The Brother 1034D has been one of my most useful sewing purchases, even though I mainly ask it to do one job. Threading is not always a walk in the park, and I still make the occasional silly mistake. But the machine is still on my sewing table and has not gone out the window. I am calling that a win.


