My Juki DDL-8700 is huge, heavy, and straight stitch only, and I love this thing. It has become my daily sewing machine because it is comfortable and easy to use. I can walk over, load up some basic white thread, and get sewing.
I have also been using a generic walking foot on it, and a little maintenance has made a noticeable difference. After sewing with some very linty fabric, I like to take the foot off, wipe it down, and give one particular metal contact point a tiny bit of sewing machine oil. It is a pretty quick job, and it helps keep dirt and oily residue away from my projects.
A note about this setup: My walking foot attachment is a modification, not a Juki-endorsed installation. I am not affiliated with JUKI Corporation, and I purchased these supplies myself. This is my personal maintenance routine for this particular foot, not a universal oiling guide. Check the instructions for your own machine and attachment before proceeding. Modifying a machine is at your own risk.
Why I Use a Walking Foot
A walking foot has its own feeding mechanism to help move the fabric layers evenly. That is especially helpful when I am quilting or sewing through layers, which is why I tend to leave it on as my default presser foot.
Mine is a YEQIN high-shank even feed walking foot, not an original Juki accessory. It was considerably less expensive, and it has been working okay for me so far.
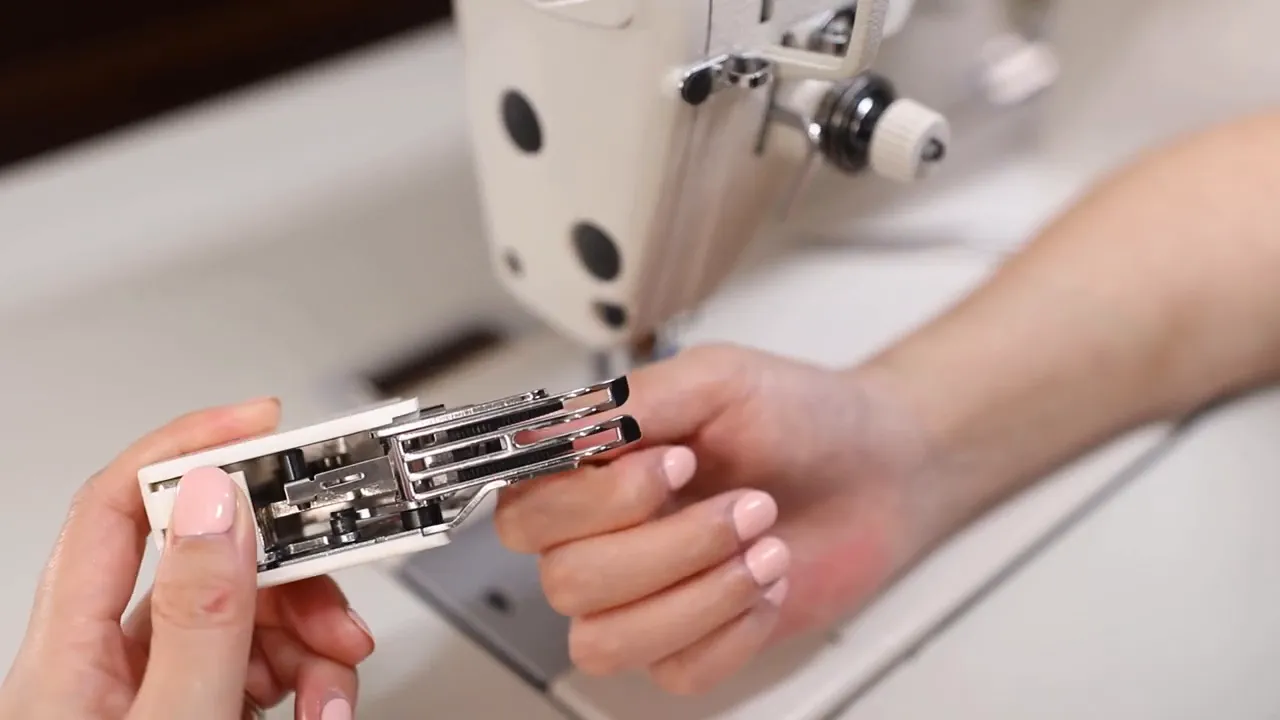
The maintenance issue I noticed was a small metal-on-metal contact area inside the foot. The parts were rubbing together, and I was getting little metal flakes. Since I started lubricating that spot, I have not noticed those shavings again. That is my experience with this attachment, rather than a guarantee that oil will resolve every wear problem.
Supplies for Cleaning and Oiling
I keep this pretty basic:
- Sewing machine oil for the contact point.
- Small sewing machine cleaning brushes for reaching into tight spaces and applying a little oil.
- 99% water-based baby wipes for wiping the detached foot and surrounding work surface.
- The appropriate screwdriver for removing and reinstalling the attachment.
The little cleaning brushes look somewhat like cotton swabs, but their heads are much smaller and made from a different material. I expected them to be bigger when I ordered them, but the tiny tips are handy for getting into small crevices.
I also keep the wipes nearby for oily screws and the machine’s work surface. I do not have a baby, but I always seem to have a use for a package of these!
Some product links are affiliate links. As an Amazon Associate, I earn from qualifying purchases.
1. Remove the Walking Foot
Switch off the machine before working around the needle and attachment. Remove the walking foot completely so you can inspect it and reach the underside without working around the machine.
On my setup, I also temporarily remove the screw that the walking foot’s operating lever engages. Keep the hardware nearby so everything is ready when it is time to reinstall the foot.
Take a moment to notice how the lever sits on its screw before removing it. That relationship matters when the attachment goes back on.
2. Wipe Away Lint, Dirt, and Old Residue
I start by wiping down the detached foot, including the bottom. Even when it does not look particularly dirty, the wipe can pick up oily residue.
If the bottom of the walking foot is dirty, that dirt can end up on your fabric. Cleaning it is not just about the attachment itself. It is also about protecting the project underneath it.
Inspect the exposed mechanism for lint, hair, and other debris. Mine was actually cleaner inside than I expected after using that linty fabric, but there was still residue worth removing.
I use a mostly water-based wipe for this routine, but that does not make it suitable for every attachment or machine surface. Follow the cleaning guidance for your equipment rather than assuming the same method applies everywhere. For Juki equipment, the official Juki industrial sewing machine site is a starting point for manufacturer information.
3. Oil the Small Metal Contact Point
For this foot, I focus on the small, round contact area inside the mechanism where the moving metal parts rub together. I am not coating the entire foot in oil.
- Put a tiny amount of sewing machine oil onto the tip of a small cleaning brush.
- Apply it directly to the metal contact area.
- Gently move the operating lever and rotate the small moving piece to spread the oil across the contact surface.
- If the brush picks up dark residue, use a fresh brush with another tiny amount of oil and repeat.
- Remove any remaining visible debris and wipe excess residue from the exterior.
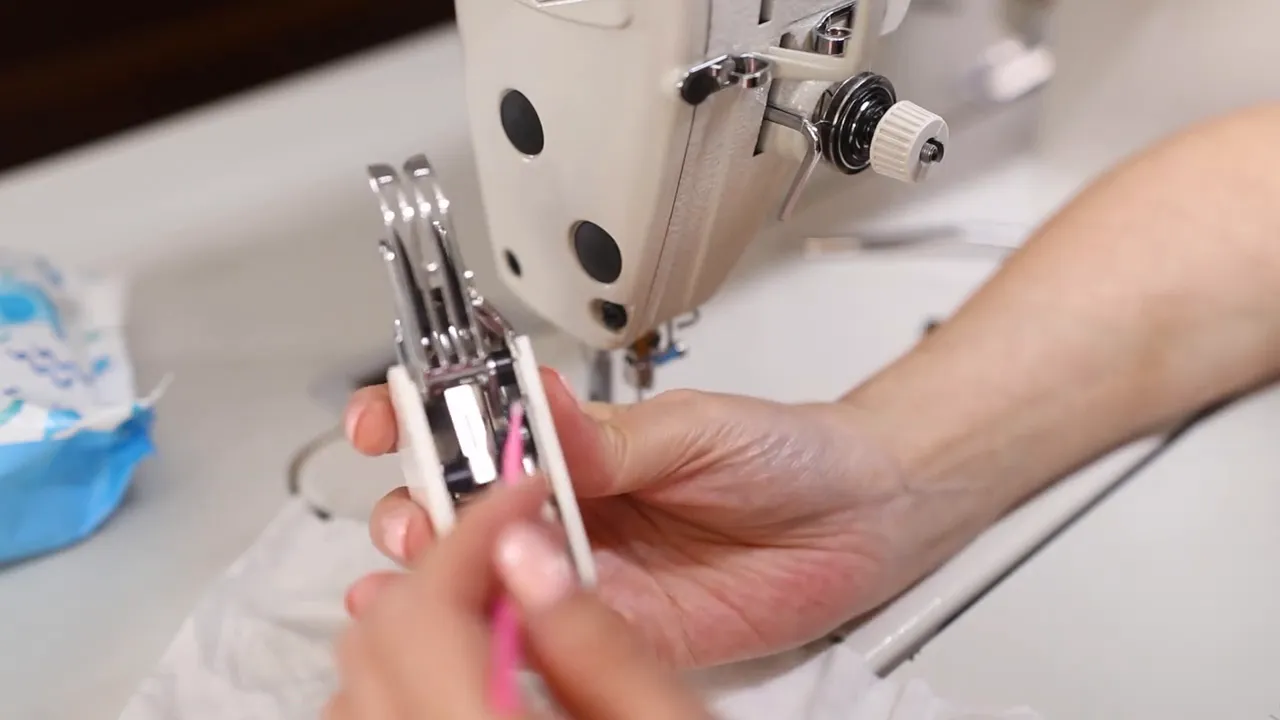
My brush turned black as I worked on that spot, so I made a second pass with a clean one. It picked up more residue, and I also removed a little hair or debris.
The purpose of the oil here is to lubricate that rubbing contact. For my attachment, this one small area is the only place I oil during this routine.
How Often I Do This
I usually clean and oil this walking foot about once every six to eight weeks. If I am sewing a lot, I do it more often.
That is my own schedule, not a manufacturer-specified interval. Your attachment’s instructions and the amount you use it should guide your routine.
4. Reinstall the Walking Foot
Slide the walking foot back into place, making sure its operating lever is positioned on the screw it engages. Then align the mounting point and start the attachment screw by hand before finishing with the appropriate screwdriver.
I keep a wipe handy here, too, because the screw can have oil or other residue on it. Once the foot is secured, I move the threads to the back and lower the presser foot.
My modified setup uses a 5-44 stainless steel socket head screw, 1/2 inch long and a 3/32-inch ball-end hex screwdriver. Those are details of my particular installation, not a compatibility recommendation for other machines. I have also shared an important update about the Juki DDL-8700 walking foot modification for additional context.
5. Check for Residue Before Using Your Good Fabric
One little experiment I tried was sewing through a water-based wipe after reinstalling the foot. It actually stitched! My thought was that any leftover oil or dirt could transfer to the wipe instead of my good fabric.
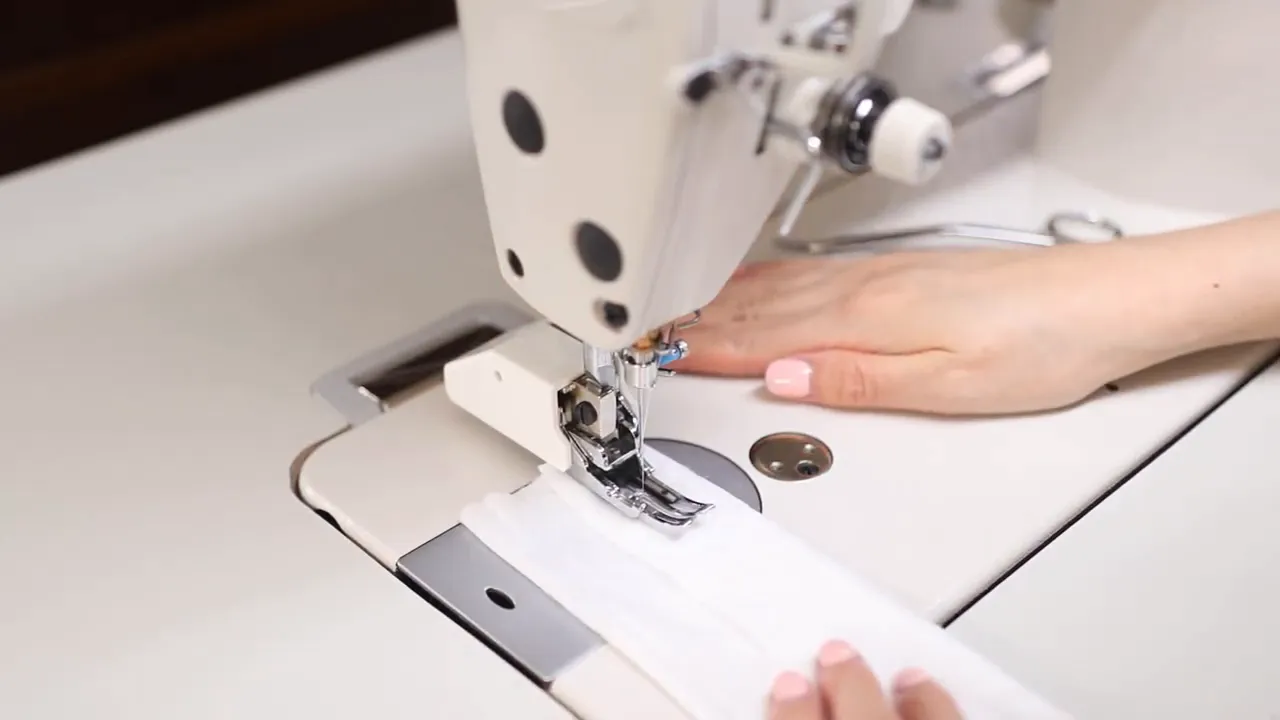
It also seemed to help pick up residue around the needle plate. I found that interesting and useful on my setup, but it was a personal experiment, not a manufacturer-approved cleaning method or a step everyone needs to copy.
The important part is not rushing straight from oiling to your project fabric. Make sure the foot is clean and excess residue has been removed first.
That is really all my walking foot maintenance involves: remove it, clean it, lubricate the specific contact point, and reinstall it carefully. It is a small job that gets me back to the fun part pretty quickly. Whatever you are making, make it fun.


